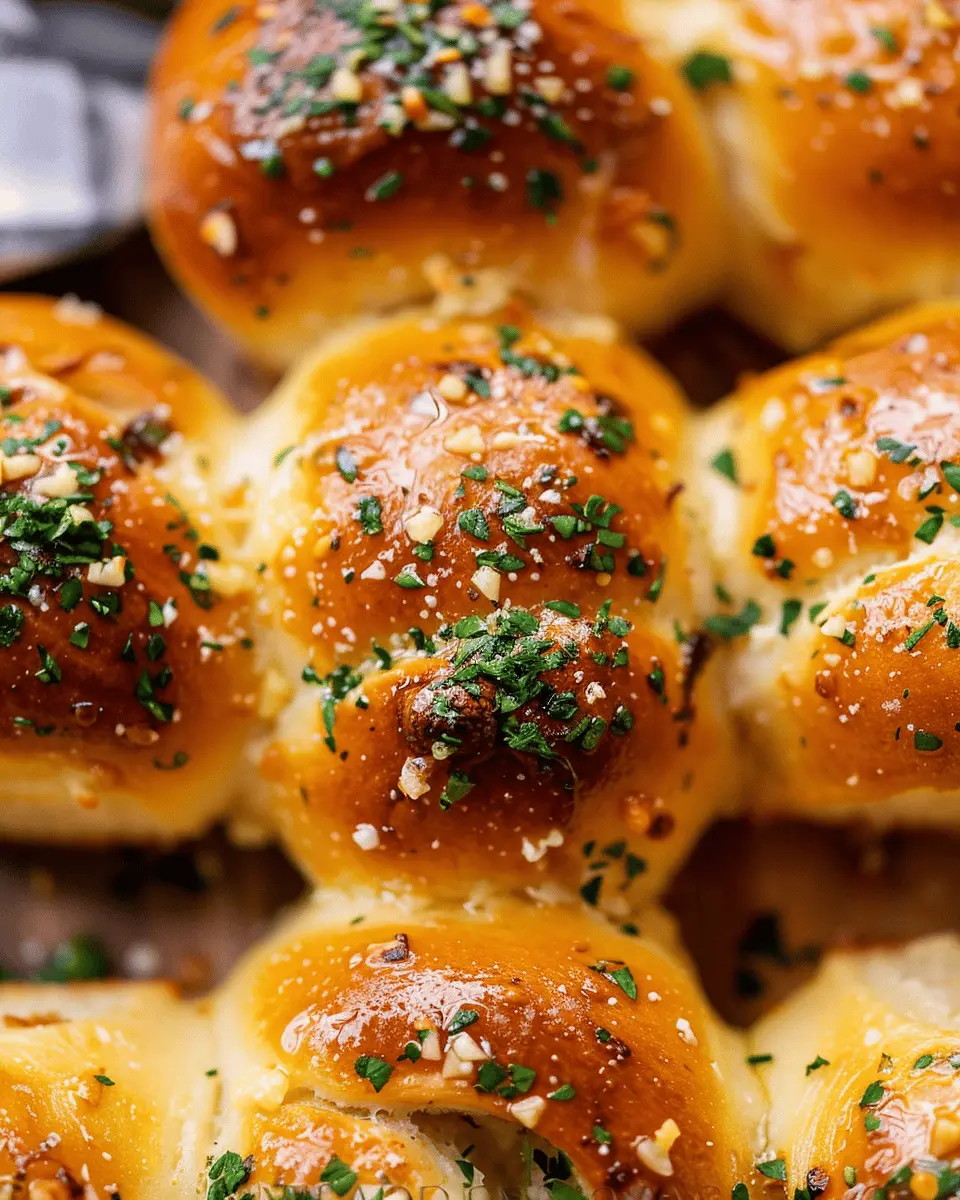
Introduction to Garlic Bread Rolls
Garlic bread rolls are the quintessential embodiment of comfort food. Just imagine pulling a tray of warm, buttery rolls out of the oven, their irresistible aroma wafting through your kitchen. It’s a scene that can crown any meal, elevate gatherings, and turn ordinary moments into extraordinary memories. Why are these rolls so captivating? First, let’s chat about that garlic flavor. It’s savory, rich, and just the right amount of punchy—perfectly balanced with the soft, pillowy texture of fresh rolls.
When you pair garlic’s robust profile with the warmth of freshly baked bread, it’s nothing short of magic. Not only do garlic bread rolls complement a range of dishes—from Italian to barbecue—but they also shine on their own when served with a simple dipping sauce or alongside fresh herbs. If you’re unsure what to serve at your next dinner party, you can never go wrong with these delightful morsels.
The Ultimate Comfort Food Experience
Did you know that the combination of carbohydrates and fats—like those found in garlic bread rolls—can trigger the release of serotonin in your brain? This makes them a great mood booster! A study from the National Institute of Health suggests that comfort foods can evoke positive memories and feelings of social connection. Think about enjoying garlic bread rolls while gathered around the table with friends and family, sharing stories and laughter. It’s no wonder they’re a go-to for many households!
So, how do you make these delicious rolls from scratch? While the thought of baking can be intimidating, trust me when I say that it’s easier than you think. Plus, the satisfaction of making your garlic bread rolls adds to the comfort factor. For the best results, consider using fresh garlic instead of pre-minced varieties, and combine it with quality butter and herbs to create that mouthwatering filling.
Feeling inspired? Let’s dive into the recipe that will have your taste buds singing! You can also check out this garlic guide for a deeper appreciation of this humble, yet mighty ingredient. By the end of this, you’ll not only have warm, garlicky perfection in hand but also a fantastic talking point for your next gathering!
Ingredients for Garlic Bread Rolls
Essential ingredients for perfect garlic bread rolls
Creating the perfect garlic bread rolls starts with a handful of essential ingredients:
- All-purpose flour: This will form the base of your dough, giving your rolls structure.
- Yeast: Go for instant yeast for quicker rising and a fluffier texture.
- Warm water: Activates the yeast and brings everything together—aim for about 110°F (43°C).
- Sugar: A touch of sugar feeds the yeast and helps the dough rise beautifully.
- Salt: Essential for flavor. Don’t skip this, as it enhances every bite.
- Butter: Use unsalted butter, melted for a rich flavor.
- Garlic: Freshly minced garlic is crucial for that robust taste, but garlic powder can substitute in a pinch.
- Parsley: Fresh, chopped parsley added for a burst of color and flavor.
Optional ingredients for variations
Feel free to take your garlic bread rolls to the next level with these optional ingredients:
- Cheese: Mozzarella or cheddar for those gooey, cheesy moments.
- Turmeric or Italian herbs: For an aromatic twist.
- Turkey bacon or chicken ham: Add some variety by incorporating savory meats.
- Olive oil: A drizzle can complement the butter and layering flavors.
Experimentation is a key part of cooking! By tweaking these ingredients, you can discover a flavor profile that suits your taste. For more tips and techniques, check out resources from reliable cooking sites like Bon Appétit or Food Network.
Step-by-step preparation of Garlic Bread Rolls
Garlic bread rolls are the ultimate comfort food, perfect for any meal or just as a cozy snack on their own. With that irresistible aroma of garlic and buttery goodness wafting through your kitchen, who can resist? Let’s guide you through the step-by-step preparation, ensuring your rolls come out fluffy and delicious every time.
Gather your ingredients
Before diving into the preparation, it’s best to gather all your ingredients. You’ll need:
- 4 cups all-purpose flour
- 2 teaspoons instant yeast
- 1 teaspoon sugar
- 1 teaspoon salt
- 1 cup warm water (about 110°F)
- 1/4 cup unsalted butter, melted
- 4 cloves garlic, minced (or more if you’re feeling bold!)
- Fresh parsley, chopped (for garnish)
- Parmesan cheese, grated (optional)
Make sure everything is at hand to streamline your process and enjoy the cooking experience!
Prepare the garlic butter
Next up, let’s whip up that delicious garlic butter that will elevate your bread rolls to heavenly status. In a mixing bowl, combine:
- 1/2 cup unsalted butter, softened
- The minced garlic (adjust based on your love for garlic)
- A pinch of salt
- Fresh parsley for that colorful touch
Mix these ingredients until well combined. You can also add a sprinkle of parmesan for an extra layer of flavor. The key here is to allow the butter to infuse the garlic flavor—set aside while you prepare the dough.
Mix the dry ingredients
In a large mixing bowl, combine the following dry ingredients:
- 4 cups all-purpose flour
- 2 teaspoons instant yeast
- 1 teaspoon sugar
- 1 teaspoon salt
Stir well to ensure the yeast is evenly distributed throughout the flour. This step is essential for achieving that perfect rise in your garlic bread rolls.
Combine wet ingredients and form dough
Now, it’s time to add the wet ingredients. Pour in:
- 1 cup of warm water
- 1/4 cup melted butter
Stir the mixture until it forms a cohesive dough. If you notice it’s too sticky, don’t hesitate to add a little more flour, a tablespoon at a time, until it comes together nicely.
Knead the dough to perfection
Turn your dough onto a lightly floured surface and start kneading. You want to develop the gluten for that soft and airy texture. Knead for about 8-10 minutes until the dough is smooth and elastic.
Listening to music or a podcast while you knead can make this part a breeze! Fun fact: kneading isn’t just for bread; it’s also a stress reliever!
Shape the rolls and let them rise
Once your dough is kneaded, it’s time to shape it. Divide the dough into evenly sized pieces (about 12 rolls). Roll them into balls and place them on a greased baking tray. Cover the rolls with a clean kitchen towel and let them rise in a warm place until they double in size, which should take about 1 hour.
This is a great time to preheat your oven to 375°F (190°C) and imagine how delicious they’ll taste!
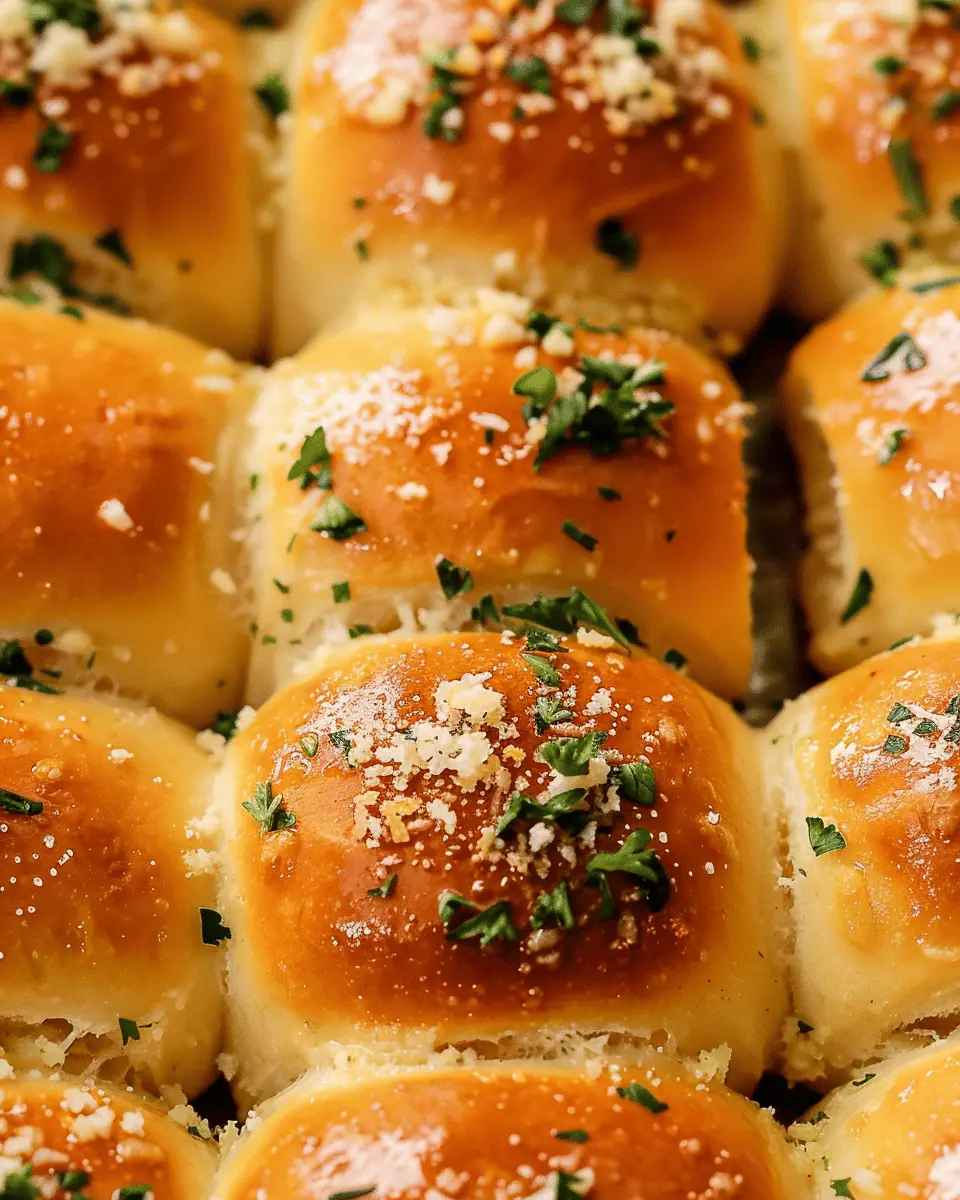
Bake the rolls to golden perfection
After your rolls have risen beautifully, pop them into the preheated oven. Bake for about 20-25 minutes or until they are golden brown. Your kitchen will start smelling like an Italian bistro, making it nearly impossible to resist sneaking a taste!
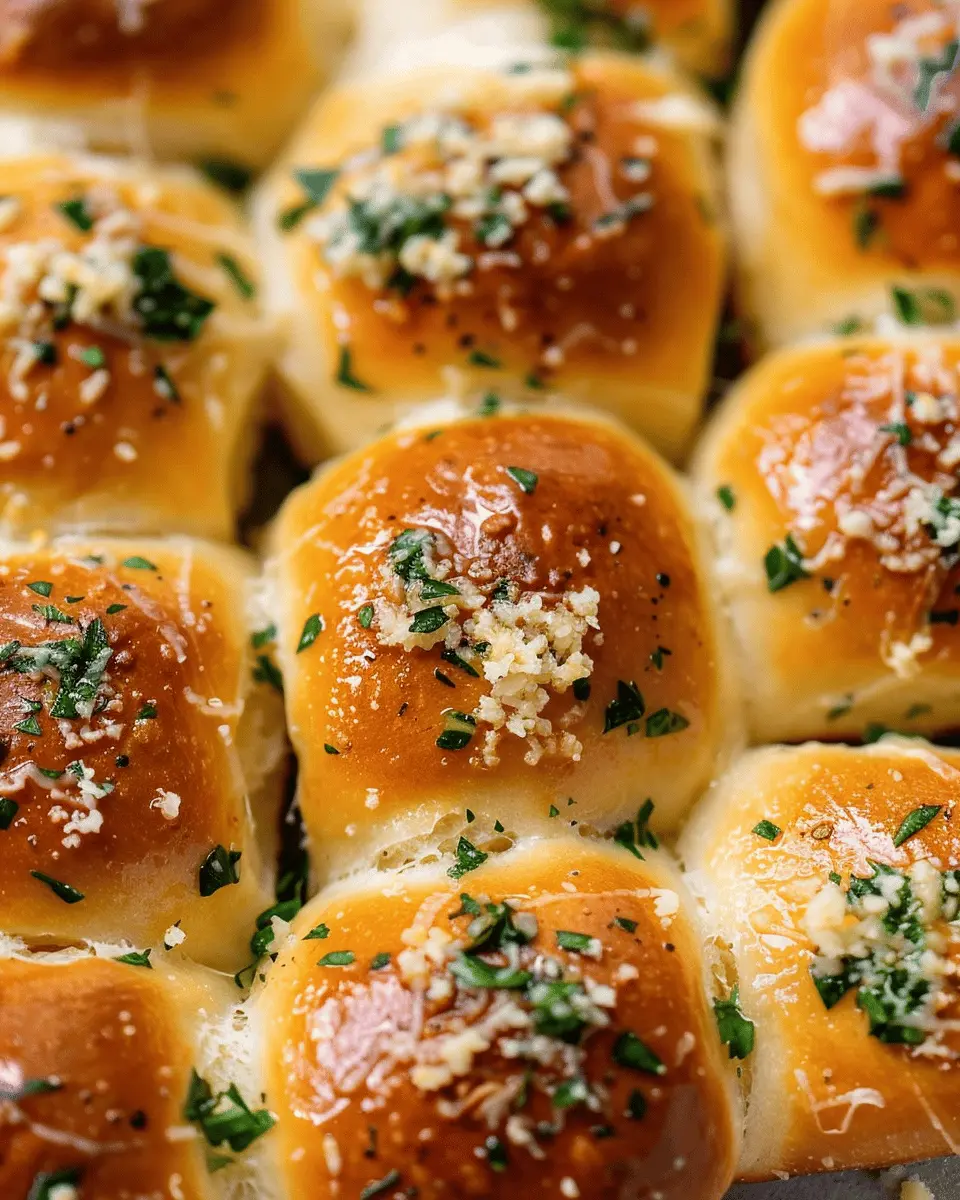
Finish with garlic butter and seasoning
As soon as they come out of the oven, brush your freshly baked rolls with the garlic butter you prepared earlier. To add a final touch, sprinkle some sea salt and chopped parsley over the top for that restaurant-worthy finish.
These garlic bread rolls are perfect for pairing with pasta dishes, soups, or even as a standalone snack. Gather your friends or family for a fun evening where you can share these delicious rolls and enjoy. Trust us, once you make them, they’ll become a staple in your home!
Happy baking! Would you consider serving these garlic bread rolls with a side salad for a complete meal?
Variations on Garlic Bread Rolls
Garlic bread rolls can be your ultimate sidekick at any meal, but have you ever thought about how to jazz them up? Let’s explore some tantalizing variations that will make your dinner parties unforgettable.
Cheesy Garlic Bread Rolls
Imagine biting into a warm, fluffy garlic bread roll, only to uncover ooey-gooey cheese melting inside. Heaven, right? To make cheesy garlic bread rolls, simply incorporate your favorite cheese into the dough. Here’s how:
- Ingredients: Add shredded mozzarella or a mix of cheddar and Monterey Jack for extra zest.
- Instructions: After mixing and kneading your dough, fold in the cheese before shaping the rolls. Brush the tops with garlic butter for that classic flavor.
This variation pairs wonderfully with marinara dipping sauce, making it a perfect addition to an Italian-themed dinner. If you want to explore more, check out this cheese guide on the best types to use.
Herbed Garlic Bread Rolls
If you’re looking for something a bit more sophisticated, herbed garlic bread rolls might just do the trick. Fresh herbs not only brighten the flavor but also add a lovely aroma to your kitchen. Here’s how to elevate your garlic bread rolls:
- Ingredients: Choose herbs like rosemary, thyme, or basil. They work beautifully with garlic!
- Instructions: Mix chopped herbs into the dough along with the garlic. This creates a fragrant, flavorful twist that’s sure to impress your guests.
Not only do these rolls complement any main dish, but they also stand out when served at brunch—paired with a lovely herbal tea. For more herbed recipe ideas, consider visiting this herb guide for great pairings.
Experimenting with garlic bread rolls opens up a world of flavors, turning a simple recipe into a gourmet experience. So, which variation will you try next?
Cooking tips and notes for Garlic Bread Rolls
Common mistakes to avoid
When making garlic bread rolls, beginners often overlook the simple yet crucial details that can make or break the dish. Here are some pitfalls to watch out for:
- Over-mixing the dough: Mix until just combined; overworking can lead to dense rolls.
- Underestimating garlic: Use fresh garlic for maximum flavor—powder just doesn’t cut it.
- Skipping the resting period: Allow the dough to rise properly for fluffier rolls; don’t rush this!
Storage tips for leftovers
Let’s be honest: sometimes you just make too many garlic bread rolls (is that even possible?). If you do have leftovers, here’s how to store them properly:
- Cool before storing: Allow the rolls to cool completely at room temperature.
- Wrap tightly: Store them in an airtight container or wrap them in plastic wrap to keep them fresh.
- Freezing for later: These rolls freeze beautifully! Just pop them in a freezer bag, and they’ll be ready for your next meal.
By following these simple tips, you can ensure your garlic bread rolls are the star of the show, not just a side note. Want to dive deeper into garlic photography? Check out this guide on food aesthetics!
Serving suggestions for Garlic Bread Rolls
Pairing Garlic Bread Rolls with Meals
Garlic bread rolls are versatile and can elevate a variety of dishes. They pair wonderfully with classics like spaghetti and meatballs or a hearty beef stew, enhancing the meal’s flavors. For a refreshing option, try serving them alongside a zesty Mediterranean salad. Feel free to dip them in marinara or a rich, homemade alfredo sauce for an added touch of indulgence. Did you know that garlic not only adds flavor but also packs health benefits? According to the National Library of Medicine, garlic can help boost the immune system!
Creative Ways to Enjoy Them as Snacks
Looking for a quick snack? Enjoy garlic bread rolls with toppings! Smear some cream cheese and sprinkle chives for a delightful twist. You can also prepare mini sandwiches with sliced turkey bacon or chicken ham—perfect for a quick lunch or snack on the go. For an easy and delicious treat, fill them with a slice of cheese and pop them in the oven for a few minutes until gooey.
Whether dining or snacking, garlic bread rolls are sure to be a crowd-pleaser!
Time breakdown for Garlic Bread Rolls
Preparation time
Getting started on your garlic bread rolls is a breeze! You’ll need about 20 minutes to gather your ingredients and whip up the dough. It’s the perfect opportunity to enjoy some music or your favorite podcast while you’re at it.
Rising time
Patience is key here! Allow the dough to rise for about 1 hour. This is when the magic happens, so try to resist the urge to poke it too frequently! If you’re curious about the science behind rising, check out The Kitchn for more insights.
Baking time
Once your rolls have risen, pop them in the oven for 15-20 minutes. The aroma of baking garlic bread rolls is simply irresistible, and you’ll want to keep an eye on them to achieve that golden-brown finish.
Total time
Altogether, you’re looking at about 1 hour and 40 minutes from start to finish. Perfect timing for an evening of relaxation or entertaining! Trust me, the end result will be worth every minute you spend.
Nutritional Facts for Garlic Bread Rolls
Garlic bread rolls are not only delicious but also bring a variety of nutrients to the table. Knowing the nutritional content can help you enjoy these indulgences guilt-free!
Calories per Roll
Each roll typically contains about 150-200 calories, depending on the recipe and portion size. This allows you to enjoy a flavorful addition to your meal without blowing your daily caloric intake.
Protein Content
Garlic bread rolls usually have around 5 grams of protein per roll. While they aren’t a primary source of protein, pairing them with a protein-rich dish can enhance your meal’s overall nutritional profile.
Important Nutrients
These rolls are a good source of carbohydrates, providing energy for your busy lifestyle. Additionally, they often contain beneficial nutrients such as:
- Fiber: Helps with digestion and keeps you feeling full.
- Vitamins and Minerals: Garlic offers antioxidants and may support immune function.
For more detailed nutritional insights, consider visiting Healthline or WhFoods for an in-depth look at the benefits of garlic in your diet. Balancing indulgence with nutrition is key to a healthy lifestyle!
FAQs about Garlic Bread Rolls
Can I make garlic bread rolls in advance?
Absolutely! Garlic bread rolls are perfect for meal prep. You can prepare the dough, shape the rolls, and refrigerate them for up to 24 hours before baking. Just let them rise at room temperature for about 30 minutes before popping them in the oven. Alternatively, you can bake the rolls in advance and freeze them. When you’re ready to enjoy, just reheat them in the oven for a few minutes, and they’ll taste freshly baked!
How do I keep the rolls fresh?
To keep your garlic bread rolls as delicious as they were fresh out of the oven, store them in an airtight container at room temperature. If you want them to last longer, consider wrapping them in foil or plastic wrap before placing them in the freezer. Just remember to let them cool completely first to avoid sogginess. When you crave a warm roll, simply reheat them in the oven or microwave for a few seconds.
What variations can I try for different flavors?
The beauty of garlic bread rolls lies in their versatility! Here are a few fun ideas to mix up your flavor game:
- Cheesy Bliss: Add mozzarella cheese into the dough or sprinkle it on top before baking for a melty treat.
- Herb Infusion: Mix in fresh herbs like rosemary or thyme for an aromatic twist.
- Spicy Kick: Consider a pinch of red pepper flakes or a dash of sriracha mixed into your butter for some heat.
Feel free to get creative! Exploring various flavors not only keeps things exciting but can also impress your dinner guests. For inspiration, check out this article on Flavor Combinations for Bread from Serious Eats. Happy baking!
Conclusion on Garlic Bread Rolls
Final thoughts on making garlic bread rolls a staple in your kitchen
Bringing garlic bread rolls into your kitchen is more than just adding a side dish—it’s about elevating every meal. These rolls are incredibly versatile, pairing well with pasta, soups, or even a fresh salad. They’re simple enough for a weeknight dinner but fancy enough to impress guests.
Imagine the aroma of warm, buttery garlic filling your home—who can resist? Plus, with so many variations, you can incorporate ingredients like cheese or herbs to keep things exciting. Ready to make them a household favorite? Explore more tips on baking and meal ideas, and enjoy the delicious journey of creating these mouthwatering rolls!
For expert advice on baking basics, check out King Arthur Baking.
PrintGarlic Bread Rolls: The Best Homemade Treat for Every Meal

These garlic bread rolls are the perfect complement to any meal, offering a warm and buttery flavor that will delight your taste buds.
- Prep Time: 30 minutes
- Cook Time: 20 minutes
- Total Time: 50 minutes
- Yield: 12 rolls
- Category: Bread
- Method: Baking
- Cuisine: Italian
- Diet: Vegetarian
Ingredients
- 2 cups all-purpose flour
- 1 packet active dry yeast
- 1 teaspoon sugar
- 1 teaspoon salt
- 1 tablespoon minced garlic
- 3 tablespoons unsalted butter
- 1 cup warm water
Instructions
- In a mixing bowl, combine the warm water, sugar, and yeast. Let it sit for 5 minutes until frothy.
- Add the flour, salt, garlic, and melted butter into the yeast mixture.
- Knead the dough for about 10 minutes until smooth and elastic.
- Cover the dough and let it rise in a warm place for 1 hour, or until doubled in size.
- Punch down the dough and shape it into rolls. Place them on a baking sheet.
- Let the rolls rise for another 30 minutes.
- Bake at 375°F (190°C) for 15-20 minutes until golden brown.
- Brush with garlic butter before serving.
Notes
- For added flavor, sprinkle some herbs on top before baking.
- These rolls pair well with pasta dishes or soups.
Nutrition
- Serving Size: 1 roll
- Calories: 150
- Sugar: 1g
- Sodium: 200mg
- Fat: 6g
- Saturated Fat: 3g
- Unsaturated Fat: 2g
- Trans Fat: 0g
- Carbohydrates: 22g
- Fiber: 1g
- Protein: 4g
- Cholesterol: 10mg