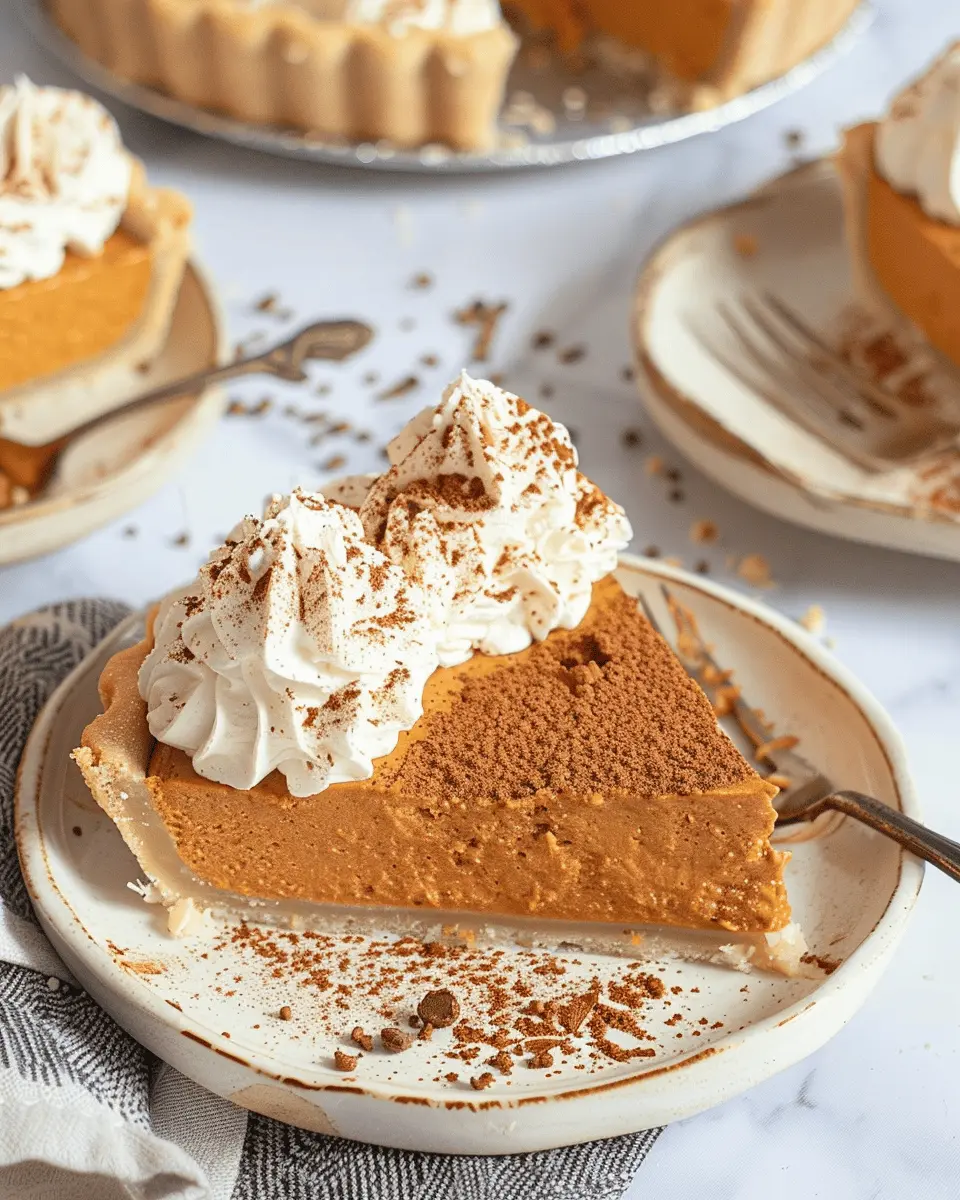
Introduction to No Bake Marshmallow Pumpkin Pie
If you’re a busy young professional, you probably juggle a million things daily—work deadlines, social commitments, and finding time to eat healthy. So, when it comes to dessert, who has the time for complicated recipes? Enter the no bake marshmallow pumpkin pie—the game-changing dessert that’s perfect for anyone who wants to impress without the stress.
Why No Bake Pies are a Game Changer for Busy Young Professionals
No bake pies have become a go-to for those of us who cherish convenience but don’t want to compromise on flavor or presentation. The no bake marshmallow pumpkin pie is your answer for an effortless indulgence that can be prepared in under an hour. Here’s why they’re ideal:
-
Speed and Simplicity: No baking means no waiting around to preheat ovens or deal with messy bakeware. Just mix, pour, and refrigerate!
-
Fewer Ingredients: Many no bake recipes, including this pie, require simple pantry staples. This means fewer grocery bills and less food waste, helping you stick to your budget.
-
Creative Expression: You get to play with flavors and textures. Add in some extra spices or toppings like crushed graham crackers, and make it feel personal. Feel free to check out Bon Appetit for inspiration on pie variations.
-
Year-Round Appeal: Sure, pumpkin pie screams fall, but who says you can’t enjoy it any time of year? This versatile recipe can be adapted to suit seasonal flavors, making it relevant every month.
Imagine bringing this no bake marshmallow pumpkin pie to a potluck or serving it at a casual dinner party with friends—it’s bound to be a hit! Plus, you’ll enjoy the satisfaction of having made something special without toiling in the kitchen for hours.
Ready to dive in? This indulgent pie is creamy, sweet, and bursting with flavors, making it not just another dessert but a delightful experience. So, grab your mixing bowl, and let’s get started on creating a delicious masterpiece that even the busiest of us can make!
Ingredients for No Bake Marshmallow Pumpkin Pie
Crafting the perfect no bake marshmallow pumpkin pie is all about assembling the right ingredients. This laid-back dessert is not just easy to make; it captures the essence of fall in each bite! Here’s what you’ll need:
- 1 pre-made graham cracker crust: This will set the foundation of your pie. Feel free to get creative with a chocolate or Oreo crust for an extra kick!
- 15 oz pumpkin puree: Make sure it’s pure pumpkin, not pumpkin pie filling, for the best flavor.
- 1 cup mini marshmallows: These will bring that delightful marshmallow fluffiness to your pie.
- 1 cup whipped topping: Light and airy, it balances out the pumpkin beautifully.
- 3/4 cup powdered sugar: Sweetness is key to layering those delicious flavors!
- 1 tsp pumpkin pie spice: A touch of this will bring that cozy aroma of autumn to your kitchen.
- Optional toppings: For an appealing presentation, consider drizzling caramel or adding crushed graham crackers on top.
As you gather your ingredients, consider checking out Pumpkin.org for more fascinating facts and tips about pumpkins! Your no bake marshmallow pumpkin pie is just around the corner. Enjoy the process and embrace the seasonal spirit!
Preparing No Bake Marshmallow Pumpkin Pie
The fall season always brings a wave of warm, comforting flavors and, of course, our favorite pumpkin recipes. One dessert that stands out is the no bake marshmallow pumpkin pie, which is as easy to make as it is delicious. Perfect for those busy weeks leading up to the holidays or casual dinners with friends, this pie is sure to impress. Let’s dive into the step-by-step process to create this delightful treat!
Step 1: Gather Your Ingredients
To make a mouthwatering no bake marshmallow pumpkin pie, you’ll need to gather the following ingredients:
- 1 (15 oz) can pumpkin puree
- 1 (10 oz) package of mini marshmallows
- 1 (8 oz) package of cream cheese
- 1 teaspoon vanilla extract
- 1 teaspoon ground cinnamon
- 1/2 teaspoon ground nutmeg
- 1/2 teaspoon ground ginger
- 1 (8 oz) tub of Cool Whip
- 1 pre-made graham cracker pie crust
You can find these ingredients at your local grocery store, or get them delivered from your favorite online retailer. Just imagine the comforting aroma of pumpkin spice filling your kitchen as you prepare this lovely pie!
Step 2: Melt the Marshmallow Mixture
The first step in creating your no bake marshmallow pumpkin pie is to melt the marshmallows. In a medium saucepan over low heat, combine the mini marshmallows with the cream cheese. Stir constantly until the mixture is smooth and velvety. Keep an eye on it—the marshmallows can stick easily! This gooey base will provide a wonderful texture to your pie, ensuring each slice is wonderfully rich.
Step 3: Mix in the Pumpkin and Spices
Once your marshmallow mixture is melted and well blended, remove it from the heat and let it cool slightly. Now, it’s time to stir in the pumpkin puree, vanilla extract, and your lovely spices—cinnamon, nutmeg, and ginger.
These spices are not only homey and warm, but they also bring antioxidants and other health benefits, making your dessert a little bit better for you. Give the filling a good mix until everything is fully incorporated. I personally love taking a moment to savor the aroma of pumpkin spice wafting through my kitchen during this step!
Step 4: Cool and Fold in the Cool Whip
Before you add the Cool Whip, make sure your pumpkin mixture has cooled down to room temperature. Once it has, gently fold in the Cool Whip with a spatula. Be sure to do this slowly—you want to maintain that fluffy texture. The Cool Whip adds that rich creaminess that balances the dense pumpkin filling beautifully. Trust me, taking this step slowly ensures you get that light, airy texture that makes every bite feel indulgent.
Step 5: Pour into the Crust
Now comes the satisfying part! Carefully pour your filling into the prepared graham cracker pie crust. Use a spatula to spread it evenly, smoothing out the top. If you’re feeling a bit adventurous, you could even sprinkle some additional cinnamon on top for a charming finish.
Step 6: Chill the Pie
Finally, it’s time to chill your pie. Cover it with plastic wrap or a lid and place it in the refrigerator for at least 4 hours, but overnight is even better. This will allow the flavors to meld and the pie to set perfectly.
As you await this delightful moment, why not explore some additional recipes that pair well with your pie? Check out seasonal salads or cozy cocktails—there are so many delicious combinations to be made during this time of year!
Once chilled, slice into your no bake marshmallow pumpkin pie and serve with extra whipped cream on top. Whether it’s for a holiday gathering or just a cozy night in, this pie is sure to become a beloved fall favorite!
Variations on No Bake Marshmallow Pumpkin Pie
Exploring variations on your no bake marshmallow pumpkin pie can turn this classic dessert into something uniquely yours. Let’s look at a couple of delicious twists!
Adding a Chocolate Layer
Who doesn’t love the combination of pumpkin and chocolate? Adding a chocolate layer to your no bake marshmallow pumpkin pie adds a rich depth of flavor that beautifully complements the pumpkin’s natural sweetness. Here’s how to do it:
- Start with a layer of melted dark or milk chocolate, poured directly onto the crust before adding the pumpkin filling.
- Allow the chocolate to set in the fridge for about 15 minutes before topping it with your pumpkin mixture.
- Optional: For added texture, consider mixing some crushed cookies into the chocolate layer.
This twist not only enhances the flavor combination but also offers a sophisticated look that will impress your guests.
Making it Gluten-Free
If you’re catering to gluten-sensitive friends, don’t worry! Your no bake marshmallow pumpkin pie can easily be made gluten-free with just a few simple swaps:
- Use gluten-free graham crackers or a nut-based crust as the base.
- Make sure your marshmallows and any other ingredients you use are labeled gluten-free (most are, but it never hurts to check).
- Top with a gluten-free whipped cream or coconut cream for a delightful finish.
By making these adjustments, everyone can enjoy the creamy goodness of this pie without the stress of gluten. For more tips on creating gluten-free recipes, check out resources like the Gluten-Free Society.
Incorporating these variations into your no bake marshmallow pumpkin pie provides not just alternative taste experiences but also makes your dessert more accessible to a wider audience. Why stick to the traditional when you can get creative and make it your own?
Cooking Tips and Notes for No Bake Marshmallow Pumpkin Pie
When preparing your no bake marshmallow pumpkin pie, a few tips can ensure a delightful outcome. First, using room-temperature cream cheese makes it easier to blend smoothly with the other ingredients, providing that velvety texture we all crave.
-
Choose Your Pumpkin Wisely: Opt for pure pumpkin puree over pumpkin pie filling to control sweetness and spices. Check out Libby’s pure pumpkin for a reliable choice.
-
Whip it Good: When whipping the heavy cream, stop just when stiff peaks form. Over-whipping can lead to a grainy texture, deviating from the creamy pie you aim for.
-
Garnish Creatively: Top your pie with fresh whipped cream, a sprinkle of cinnamon, or even some toasted pecans for added texture and flavor. Presentation counts!
-
Chill Time Matters: Let the pie set in the refrigerator for at least 4 hours, or overnight if possible. This helps develop the flavors and gives you that perfect slice.
Enjoy creating your no bake marshmallow pumpkin pie, and don’t forget to share your creation with friends—it really is a crowd-pleaser! If you’re looking for more tips on pumpkin recipes or pie variations, be sure to check out Pumpkin Pointers for some inspiration.
Serving Suggestions for No Bake Marshmallow Pumpkin Pie
When it comes to enjoying your no bake marshmallow pumpkin pie, creativity knows no bounds! This delightful dessert not only offers a luscious flavor but also pairs beautifully with a variety of accompaniments. Here are some delicious ideas to elevate your dessert experience:
Perfect Pairings
-
Fresh Whipped Cream: Adding a dollop of homemade whipped cream on top can enhance the creamy texture and provide a delightful contrast.
-
Cinnamon or Nutmeg Sprinkle: A light dusting of cinnamon or nutmeg not only adds visual appeal but also brings out the warm spices in the pie.
Sides to Consider
-
Ginger Snap Cookies: Serve your pie with a side of ginger snap cookies for an extra crunch. The spice in the cookies complements the pumpkin perfectly.
-
Fruit Garnish: Consider fresh slices of apple or pear to round out the flavors. Seasonal fruit adds a refreshing touch!
Beverage Options
To wash it all down, consider a warm apple cider or a steaming cup of chai tea. Both beverages will perfectly complement the no bake marshmallow pumpkin pie’s rich, creamy texture.
Happy serving! For more tips and variations on this delightful treat, consider checking out KitchenStories for inspiration on creative dessert pairings.
Time breakdown for No Bake Marshmallow Pumpkin Pie
Preparation time
Creating your no bake marshmallow pumpkin pie is a delightful experience that only takes about 20 minutes. You’ll want to gather all your ingredients first, including pumpkin puree, marshmallows, and a graham cracker crust. This is where the fun begins—mixing and blending flavors to create a delicious filling.
Chilling time
Once you’ve prepared your pie, it’s crucial to let it chill for about 4 to 6 hours, or even overnight if you can wait! This allows the consistency to firm up and the flavors to meld beautifully. It’s a great time to unwind or prep some side dishes.
Total time
In total, you’re looking at roughly 4 hours and 20 minutes to enjoy this scrumptious no bake marshmallow pumpkin pie. That’s a small investment for a delightful dessert that will impress your friends and family. Want expert tips on how to enhance your pie-making journey? Check out this article on dessert techniques.
Whether you’re hosting a party or simply indulging yourself, this pie is sure to be a hit!
Nutritional Facts for No Bake Marshmallow Pumpkin Pie
When it comes to indulging in a delightful dessert without the hassle of baking, this no bake marshmallow pumpkin pie is a winner! Here’s a quick breakdown of what you’re getting nutrition-wise:
Calories
Each slice of this creamy pie typically contains around 250-300 calories, depending on the ingredients used. It’s a satisfying treat that won’t completely derail your wellness goals.
Protein
With approximately 2-4 grams of protein per slice, you can enjoy this sweet dessert while still getting a little boost to your protein intake. Consider adding some crushed nuts on top to up the ante!
Sodium
What about sodium? Each slice generally contains around 150-200 milligrams, making it a relatively low-sodium option compared to many traditional desserts.
For more tips on healthy dessert choices, check out resources like the USDA Dietary Guidelines for some insightful information that can help you make informed decisions. Embrace the joy of delicious treats while maintaining balance in your diet!
FAQ about No Bake Marshmallow Pumpkin Pie
Can I use fresh pumpkin instead of canned?
Absolutely! Using fresh pumpkin can elevate the flavor of your no bake marshmallow pumpkin pie. Start by roasting a sugar pumpkin until tender—this usually takes about 45 minutes in a 400°F oven. Once it cools, scoop out the flesh and puree it in a blender or food processor until smooth. You will need about 1 1/2 cups of fresh pumpkin puree, similar to what you would get from a can. However, do note that canned pumpkin is often more consistent in flavor and texture, making it a popular choice for pie lovers.
How long does the pie last in the fridge?
Once you’ve whipped up your no bake marshmallow pumpkin pie, it can last in the fridge for about 3 to 5 days. To keep it fresh, cover your pie tightly with plastic wrap or store it in an airtight container. If you’re anything like me, you might find it hard not to nibble on it daily; but rest assured, it retains its deliciousness over a few days!
What can I use instead of Cool Whip?
Not a fan of Cool Whip? No problem! You can substitute it with whipped heavy cream, which gives a light, airy texture. Just whip 1 cup of heavy cream with a bit of sugar and vanilla until soft peaks form, and fold it into your pumpkin mixture. Alternatively, a dairy-free option like coconut whipped cream works wonderfully if you want a vegan alternative. You can find a great recipe for coconut whipped cream here.
With these tips, you’re on your way to mastering the art of no bake marshmallow pumpkin pie! Enjoy your baking adventure!
Conclusion on No Bake Marshmallow Pumpkin Pie
In conclusion, the no bake marshmallow pumpkin pie is not just a dessert; it’s a delightful experience that captures the essence of fall. Whether you’re hosting a gathering or just enjoying a cozy night in, this pie’s creamy texture and seasonal flavor will surely impress. Plus, its simplicity means you can whip it up in no time, leaving you free to savor those precious moments with friends and family.
Remember, you can customize the recipe to suit your tastes. For inspiration on variations, check out more from Food Network. Enjoy this luscious treat and embrace the joy it brings—happy baking!
PrintNo Bake Marshmallow Pumpkin Pie: The Easiest Delightful Dessert
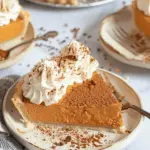
A delicious no bake pumpkin pie topped with marshmallows.
- Prep Time: 20 minutes
- Total Time: 2 hours 20 minutes
- Yield: 8 servings
- Category: Dessert
- Method: No Bake
- Cuisine: American
- Diet: Vegetarian
Ingredients
- 1 1/2 cups graham cracker crumbs
- 1/2 cup unsalted butter, melted
- 1 can (15 oz) pumpkin puree
- 1 cup powdered sugar
- 1 teaspoon pumpkin pie spice
- 1/2 teaspoon vanilla extract
- 1 tub (8 oz) whipped topping
- 2 cups mini marshmallows
Instructions
- In a bowl, combine graham cracker crumbs and melted butter. Press into a pie dish.
- In another bowl, mix pumpkin puree, powdered sugar, pumpkin pie spice, and vanilla extract until smooth.
- Fold in whipped topping until well combined.
- Spread the pumpkin mixture over the crust, then top with mini marshmallows.
- Chill in the refrigerator for at least 2 hours before serving.
Notes
- For a sweeter pie, add more powdered sugar.
- Make sure to chill the pie well before serving for the best texture.
Nutrition
- Serving Size: 1 slice
- Calories: 320
- Sugar: 25g
- Sodium: 150mg
- Fat: 15g
- Saturated Fat: 9g
- Unsaturated Fat: 4g
- Trans Fat: 0g
- Carbohydrates: 44g
- Fiber: 1g
- Protein: 3g
- Cholesterol: 30mg